Showing posts with label Petal Burst Embossing Folder. Show all posts

Wednesday, May 1, 2019

Stampin' Up! Happy Birthday Gorgeous and Petal Burst Card


I love it when a failure turns into something I love. I knew I wanted to use the Stampin' Up! Stampin' Blends Markers to colour portions of the Petal Burst Embossing Folder. I had previously used a Whisper White card stock and a mixture of greens which didn't work. So I stuck with a monochromatic colour scheme of Old Olive and                            Mossy Meadow with a touch of Vellum. I also used Circle Punches and the Classic Label Punch. In my video below I showed how to colour Rhinestones as a finishing touch as suggested by one of my customers.
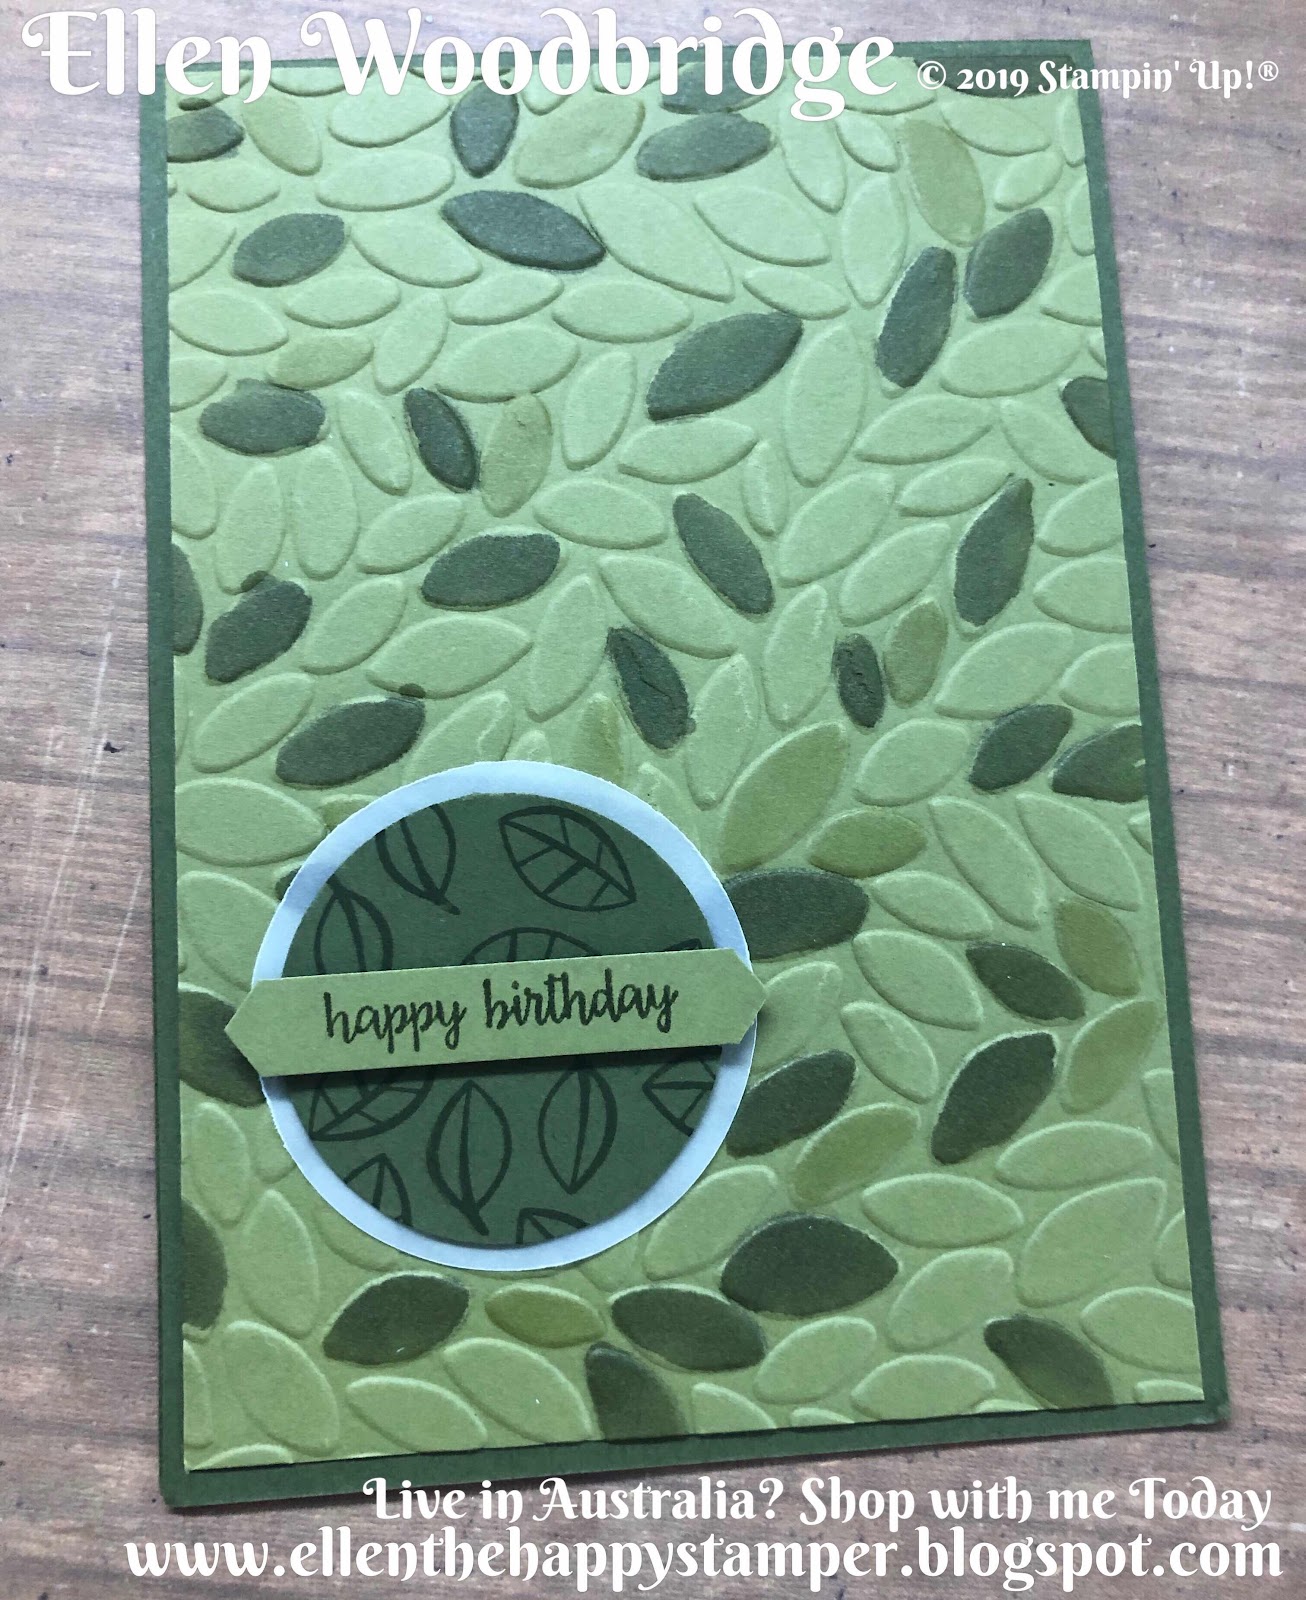

To see how these cards came together you can watch the replay of the Facebook LIVE Video or below on You Tube


SHOP NOW - go to my Online Store or contact me to place an order RIGHT NOW!

_________________________________________________

_________________________________________________

_________________________________________________


_________________________________________________

__________________________________________________

Be sure to check out my CLASSES below or consider Hosting a Party and share your love of Stampin' Up! and the NEW Catalogue with your friends.

 My Classes are mostly monthly on a Sunday exact times and dates are in the Classes Tab above. 

Its time to say goodbye to many of our catalogue products so lets have one last play before they are gone forever

Launch Party 2019-2020 Annual Catalogue June 16th 1pm $20
Come Along and Celebrate 2019-2020 Annual Catalogue with projects to make prizes, friends and fun!! 

RSVP to me on 0421074703 to RESERVE your spot.

Enjoy Ellen xxx

Tuesday, March 7, 2017

Birthday Bright, Love & Affection with Petal Burst Card

I crashed my friend's Stampin' Up! Color Challenge on the FaceBook group. The colours she got were Night of Navy, Peekaboo Peach and Flirty Flamingo. I started with the embossed background Petal Burst and die cut the Circle from the Stitched Shapes Framelits in the Big Shot. I stamped the sentiment from Birthday Bright stamp set in Night of Navy and the flowers from the Love & Affection stamp set in Peekaboo Peach and Flirty Flamingo. I set it on a strip of Flirty Flamingo card stock flagged with the Banner Triple Punch and some Peekaboo Peach Ruched Ribbon. As a final touch I tied a piece of Night of Navy Solid Bakers Twine into a bow. 

Don't forget to FOLLOW my Blog by email to keep up to date <-------

To order any of the products used on this project and more, simply go to my SHOP NOW button above to go to my Online store or contact me to place an order. Don't forget your FREE Sale-a-Bration items for every $90 SPENT

I can also show you how to make these projects at a party with you and your friends. Just contact me to organise a time to enjoy the amazing benefits during Sale-A-Bration our hostesses can earn and spend on anything in our catalogues including our NEW Occasions Catalogue.

Thanks for stopping By
Ellen

Wednesday, July 6, 2016

Falling Flowers & Bunch of Blossoms, Swirly Scribbles & May Flower Framelits with #WWYS71

I am so happy to be participating in the What Will you Stamp Challenge Blog this week as I have the stamp set Falling Flowers and decided to CASE the layout my Fairy Celebration card from last week. 


To start the card I chose the colours Tip Top Taupe Card Base, Mint Macaron trimmed down card front and Sweet Sugarplum for the flower and Pear Pizazz for the leaf. I started by stamping the Flower from the Falling Flowers stamp set in Sweet Sugarplum on Sweet Sugarplum card stock. Next I embossed the Mint Macaron piece with the Petal Burst Embossing folder in the Big Shot. While I had the Big Shot out I die cut the largest circle in Silver Glimmer paper from Swirly Scribbles, the Flower and Leaf from the May Flower Framelits, using the Die Brush to remove the intricate die cuts from the Dies and little pieces from the die cuts. I assembled the card using Fast Fuse on the embossed piece attaching it the card base. Tombow Multi Purpose Glue on both the leaf and circle. To give to Flower some dimension I used my Blender Pen and Sweet Sugarplum ink to colour on some of the petals and attached it to the card with Stampin' Dimensionals. I stamped the sentiment from the Bunch Of Blossoms stamp set in Sweet Sugar Plum onto a scrap of Vellum. You can either let it dry or used our Heat Tool on setting to dry the ink. I then punched it out with the shorter end of the Decorative Label Punch and placed it back in the punch to shorten it and adhered it using Fast Fuse all over the vellum.

To order any of the products I have used on this project and more simply go to my SHOP NOW button above to go to my Online store or contact me to place an order.

I can also show you how to make this card at a party with you and your friends. Just contact me to organise a time to enjoy the amazing benefits our hostess can earn and spend on anything in our catalogues.

Thanks for stopping By
Ellen

Tuesday, June 28, 2016

Fairy Celebration with Petal Burst and Swirly Scribbles using #GDP042

I have been itching to use this super cute Fairy Celebraton stamp set since I got it but life and other stamp sets got in the way. But today was the the play along with it and he Global Design Project Sketch Challenge #042


I started by stamping the Fairy in Stazon ink and and coloured it using our Blender Pen and   Peekaboo Peach, Rich Razzleberry, Blushing Bride, Sweet Sugarplum, Flirty Flamingo and Chocolate Chip ink on Whisper White card stock. I punched the image out using the 1 3/4" Circle Punch and edged it in Sweet Sugarplum ink. Using the Big Shot I used out NEW Petal Burst embossing folder with a piece of Soft Sky card stock and used the Swirly Scribbles largest die to cut out with Silver Glimmer Paper. I stamped the happy birthday stamp also from Fairy Celebrations in Soft Sky ink onto Blushing Bride card stock and punched using the Classic Label punch. I adhered the embossed piece to a Sweet Sugarplum card base and following the sketch adhered the Glimmer piece directly to the card and the Fairy and sentiment pieces using Stampin' Dimensionals. Next I stamped the fairy trail in Soft Sky Ink across the embossed piece. As a finishing touch I used clear Wink of Stella on the fairy wings and stamped trail to add a touch of whimsey.

To order any of the products I have used on this project and more simply go to my SHOP NOW button above to go to my Online store or contact me to place an order.

I can also show you how to make this card at a party with you and your friends. Just contact me to organise a time to enjoy the amazing benefits our hostess can earn and spend on anything in our catalogues.

Thanks for stopping By
Ellen